
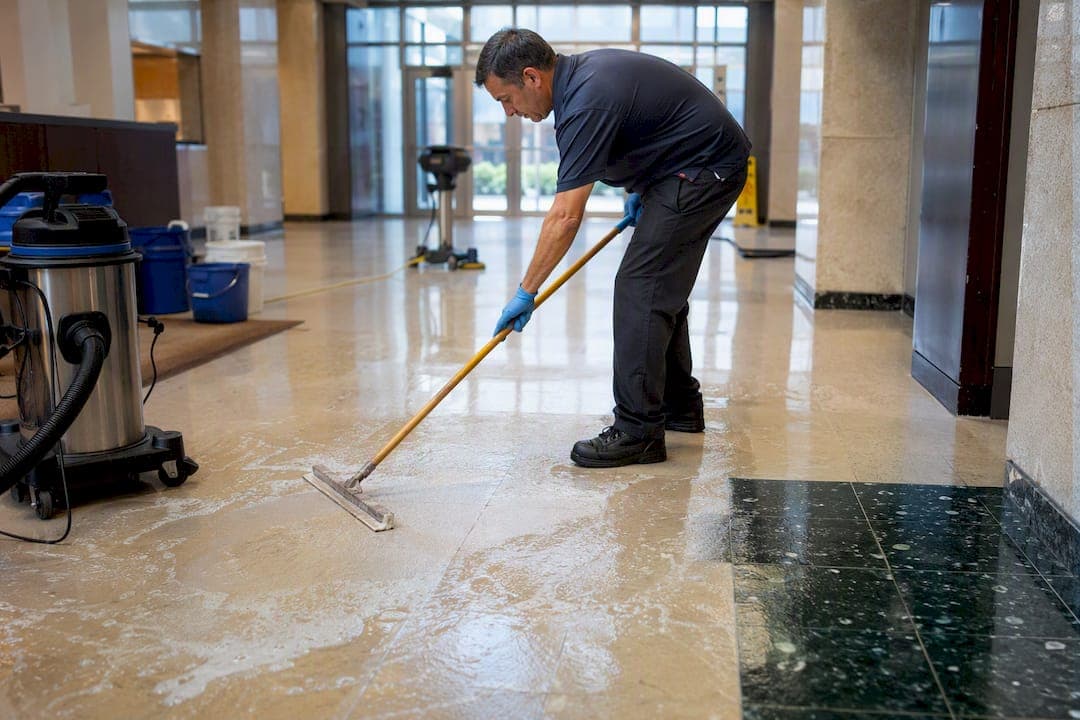
Strip a VCT floor when the finish looks yellowed, uneven, or shrugs off a burnisher instead of gaining gloss. If your floor fails that test, the immediate move is: cordon off the area, apply a commercial stripper, run a 175 RPM machine with a black pad to break down the finish, recover the slurry before it dries, rinse twice, dry completely, then rebuild with thin coats of finish. If the floor is just dull in traffic lanes but otherwise sound, you likely need a scrub-and-recoat instead of a full strip. The full procedure follows below.
TL;DR:
- Full stripping is necessary only when the finish is yellowed, cracked, or remains dull despite burnishing, while dull traffic lanes can be addressed with scrub-and-recoat.
- Proper preparation, including sweeping, signage, ventilation, and protective gear, is essential to avoid job mishaps and ensure safety during stripping.
- Applying thin, even coats with full drying time between layers and rinsing twice with neutral pH water is key to achieving a glossy, tack-free finish.
- Common finishing problems like cloudiness, tackiness, or yellowing stem from improper rinsing, thick coats, or residue, requiring correct diagnosis and correction.
- For large facilities or frequent maintenance needs, hiring professional contractors can reduce costs and improve scheduling efficiency over in-house crews.
Table of Contents
- When Should You Strip VCT Floors Versus Recoat Them?
- What Prep and Safety Steps Come Before Stripping?
- How Do You Strip a VCT Floor Step by Step?
- How Do You Rinse and Verify the Floor Is Ready for Finish?
- How Should You Apply Finish to a Freshly Stripped VCT Floor?
- What Equipment and Materials Do You Need on Site?
- Why Do Floors End Up Cloudy, Tacky, or Yellowed?
- How Do You Build a Program That Reduces Full Strips?
- When Does It Make Sense to Hire a Contractor Instead of Doing It In-House?
- Get a Quote for Professional VCT Strip-and-Refinish Service
- Where to Find Manufacturer and Industry Specs
- Sources
When Should You Strip VCT Floors Versus Recoat Them?
The decision comes down to what the old finish is doing, not how old it is. A full VCT floor stripping and waxing job is warranted when you see yellowing, a brittle or cracking finish, or traffic lanes that stay dull no matter how hard you burnish them. If burnishing brings back gloss, you don't need a strip. That's a scrub-and-recoat situation, and it's cheaper.
A realistic maintenance cadence generally includes daily dust-mopping or auto-scrubbing to keep grit from grinding into the finish; burnishing high-traffic lanes multiple times per week to restore gloss mechanically; periodic scrub-and-recoats every few months to add a fresh finish layer without removing existing coats; and full strip and refinish cycles annually or as needed depending on foot traffic and finish buildup.
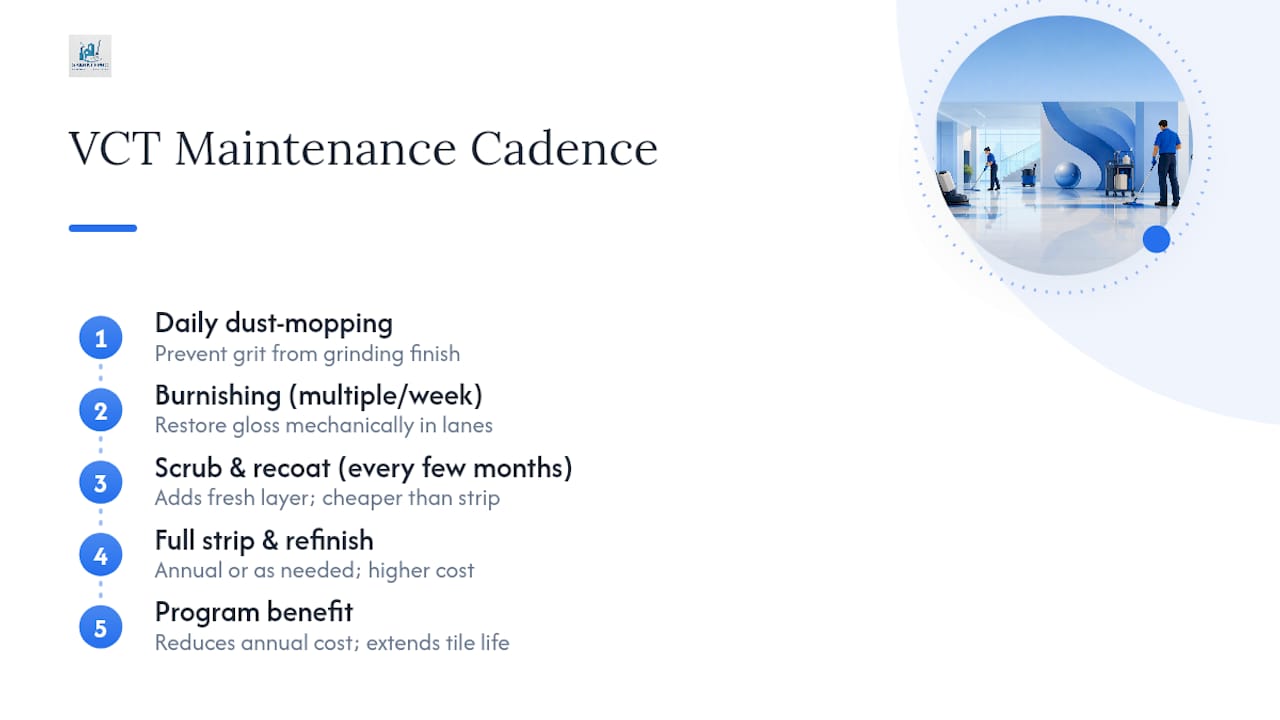
Square footage and traffic volume drive the economics more than most managers expect. A 20,000 square foot lobby with heavy through traffic can justify two full strips a year; a low-traffic back office might go 18 months. Stripping too often is the more common and more expensive mistake. Labor and materials for a full strip typically run higher per square foot than a scrub-and-recoat, and stripping more than the floor needs shortens the life of the tile's wear layer. A disciplined floor maintenance program built around burnishing and interim recoats keeps annual cost down, according to the Opora Supply field guide.
What Prep and Safety Steps Come Before Stripping?
Rushing prep is where most stripping jobs go sideways. Before any chemical touches the floor, run through this sequence:
- Move furniture, mats, and equipment clear of the work zone.
- Sweep and dust-mop to remove loose grit that will contaminate the slurry.
- Post signage and set up physical barriers to keep foot traffic out.
- Confirm ventilation. Open windows or run fans; stripper fumes build up fast in closed rooms.
- Test a 4 by 4 foot section to judge finish buildup and confirm your pad choice before committing to the whole floor.
- Notify building occupants and, in multi-tenant properties, adjacent businesses about the closure window.
PPE is non-negotiable: chemical-resistant gloves, eye protection, and non-slip footwear at minimum. Avoid hot water when mixing stripper. It evaporates faster, which shortens dwell time and forces you to rework sections. Never strip a newly installed floor less than five days after installation, and manufacturer guidance from Armstrong's FloorExpert resource cautions against aggressive no-rinse strippers on tile under two years old.
Pro Tip: Stage your wet-vac or auto-scrubber next to the work zone before you mix a single drop of stripper. Once slurry starts pooling, you won't have time to go hunting for equipment.
How Do You Strip a VCT Floor Step by Step?
Here is the sequence that professional crews follow, condensed into a usable order:
- Mix the stripper. Follow the product label's dilution ratio. Light buildup calls for a lighter dilution; heavy, multi-year buildup needs a stronger mix. Under-diluting wastes product and risks residue; over-diluting means the stripper won't cut through old finish and you'll be reworking the same section twice.
- Apply in sections. Work areas of 100 to 400 square feet at a time so the stripper never dries before you agitate it, a sizing approach echoed in Pro-San's step-by-step guide.
- Let it dwell. Most jobs need 5 to 10 minutes of dwell time, but always defer to the product instructions. Keep the surface wet during this window; a stripper that dries out stops working.
- Agitate with a low-speed machine. A 175 RPM floor machine fitted with a black stripping pad breaks the softened finish loose. Overlap each pass by a few inches so you don't leave thin strips of untouched finish between passes.
- Handle edges and corners by hand. A doodlebug pad or hand pad gets into spots the machine can't reach, including along baseboards and under fixed equipment.
- Recover the slurry immediately. Wet-vac or auto-scrubber pickup should follow right behind the machine. This is not a step to batch at the end. Slurry that dries on the tile redeposits old finish and forces you to strip the same section again, a point Imperial Dade's refinishing guide flags as one of the most common and avoidable mistakes.
A few things separate a clean job from a redo:
- Keep a wet edge across the whole section; never let stripper dry mid-application.
- Change pads once they load up with old finish; a clogged pad just pushes slurry around instead of lifting it.
- Watch dwell time against ambient temperature. Warm rooms shorten it.
A mid-size commercial floor can take several hours from first application to final rinse when you're working it correctly in controlled sections, according to Green Clean Janitorial's breakdown of the stripping timeline. Budget for that; rushing the recovery step is how clouding problems start two steps later.
How Do You Rinse and Verify the Floor Is Ready for Finish?
Skipping the rinse is the single most common cause of finish adhesion failure, and it's an easy mistake to make when a crew is racing a closing window. Rinse twice with clean water, and pull every bit of that rinse water back up with a wet-vac or auto-scrubber. Standing rinse water left to air-dry leaves a film that keeps new finish from bonding.
Before applying any finish, check pH with litmus paper or a drain test. You're targeting a neutral range of roughly 6 to 8. Anything higher means stripper residue is still on the tile.
- Rinse twice, minimum, with fresh water each time.
- Pull rinse water fully; don't let it evaporate on its own.
- Confirm pH lands in the 6 to 8 range before moving to finish.
- Let the floor dry completely. Use fans to move air across the surface, and watch humidity; damp conditions can stretch a one-hour dry time into three or four.
Touch the tile with a clean, dry hand in a few spots. If it feels tacky or damp, wait. Applying finish over a floor that isn't fully dry is how you end up with cloudy patches days later.
How Should You Apply Finish to a Freshly Stripped VCT Floor?
Thin coats beat thick coats every time. A single gallon of finish, applied correctly, typically covers 1,000 to 2,000 square feet per coat. Pouring it on heavier doesn't save time; it causes pooling in the tile seams, traps solvent underneath, and leaves the surface soft and tacky instead of hard and glossy.
For a freshly stripped floor, plan on 3 to 5 coats, which lines up with the coat counts recommended in Armstrong's maintenance documentation. Heavier-traffic areas or floors without a base sealer often need the higher end of that range; lighter-traffic rooms can get by with fewer coats.
Let each coat dry fully before applying the next. Rushing recoats traps moisture between layers, and that's a direct path to the cloudy or tacky finish problems covered in the troubleshooting section below.
- Apply thin, even coats with a clean flat mop or finish applicator.
- Wait for full dry time between coats, not just surface-dry.
- Hold off on burnishing until the finish has fully cured. Early burnishing scuffs a soft finish instead of polishing it.
- Once cured, high-speed burnishing at 1,500 to 2,000 RPM restores gloss mechanically and reduces how often you need to lay down another coat.
Pro Tip: If you're deciding between one thick coat and two thin ones, always choose two thin ones. The extra 20 minutes of dry time is cheaper than reworking a tacky floor next week.
What Equipment and Materials Do You Need on Site?
A strip-and-wax job runs smoothly when the right gear is staged before work starts, not scavenged mid-job.
Typical equipment includes a low-speed rotary floor machine for stripping, a wet-vac or auto-scrubber for slurry and rinse recovery, and a high-speed burnisher for gloss restoration after curing.
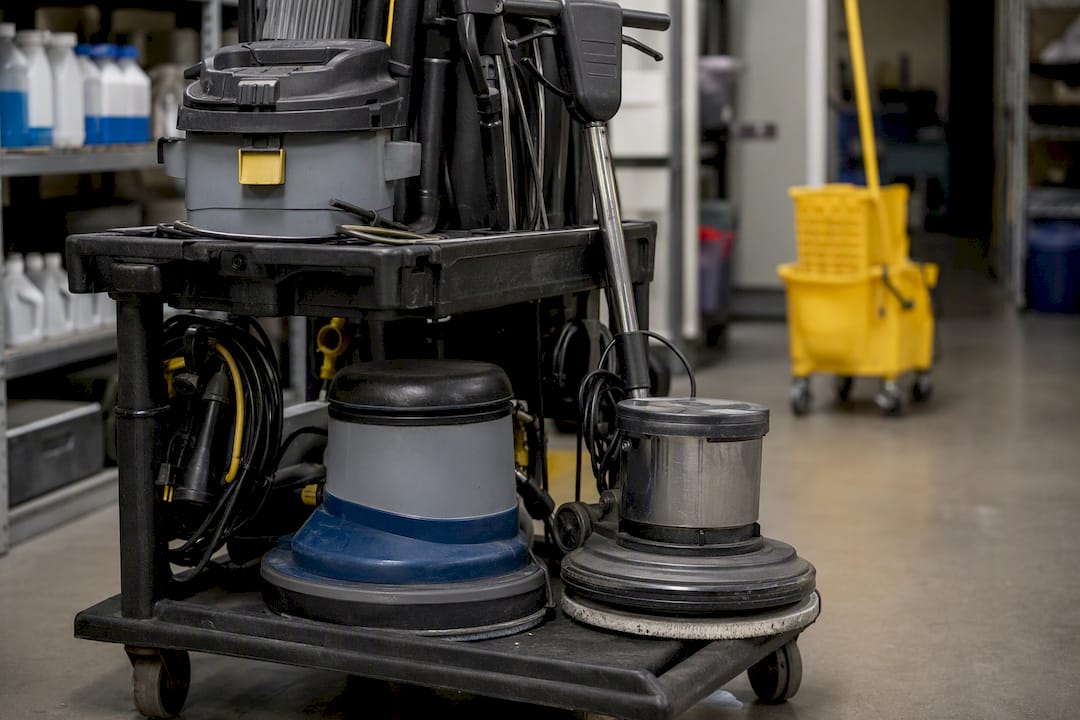
Pad selection corresponds to the task: aggressive stripping uses dark-colored pads, scrubbing and interim recoats use moderate-level abrasiveness pads, and daily maintenance employs softer pads.
Chemical categories generally include high-pH strippers for full removal, neutral pH cleaners for daily maintenance, and floor finishes or sealers formulated for VCT.
- Consumables: floor signs, physical barriers, mop buckets, hand or doodlebug pads for edges, and full PPE for every crew member on the job.
Matching pad color to chemistry and task is one of the lowest-effort, highest-impact decisions on the whole job. Guessing wrong wastes a pad and can scratch a finish you just applied.
Why Do Floors End Up Cloudy, Tacky, or Yellowed?
Most VCT finish problems trace back to one of four root causes, and each has a specific fix.
| Problem | Likely Cause | Fix |
|---|---|---|
| Cloudy or hazy finish | Residual rinse water or incomplete drying before finish went down | Re-rinse fully, confirm complete dryness, then recoat with thin layers; strip and start over if clouding persists |
| Tacky finish | Coats applied too thick, or recoated before prior coat dried | Remove tacky coats, reapply thinner coats, allow full dry time between each |
| Yellow or brittle finish | Too many accumulated coats, or finish has simply aged out | Schedule a full strip and reduce coat count going forward |
| Incomplete stripper removal | Worn pad, machine speed too low, or stripper under-diluted | Check pad condition and dilution ratio, then repeat a localized strip on the affected section |
Diagnosing these correctly saves a full redo. A tacky finish and a cloudy finish look similar at first glance but need different fixes, and treating one like the other just wastes another round of product.
How Do You Build a Program That Reduces Full Strips?
The floors that go the longest between full strips aren't lucky. They're on a program. Daily cleaning with a neutral cleaner in the 7 to 9 pH range keeps grit and spills from etching the finish. Burnishing high-traffic lanes 2 to 3 times a week catches dullness early. A practical trigger to watch for: if a lane looks visibly dull from 10 feet away, it's time to burnish before it's time to strip.
Between full strips, a scrub-and-recoat every 3 to 6 months adds a fresh finish layer without stripping anything. On large facilities, timing a mid-cycle scrub-and-recoat correctly can lower annual stripping costs by 15 to 25 percent, according to Opora Supply's field guide, simply by extending the interval between expensive full strips.
Document everything. A VCT addendum in your cleaning contract should record initial coat counts, the approved finish product, pad specs used, and the specific conditions that trigger a strip. That paperwork prevents disputes at contract renewal and gives whoever inherits the floor plan a clear record instead of a guess.
- Log coat counts and finish product after every full strip or recoat.
- Set burnishing frequency by traffic zone, not by a blanket building-wide schedule.
- Review the program annually against actual wear, not the calendar alone.
Pro Tip: Before requesting a quote, walk your building and note which lobbies, hallways, or breakrooms show dulling first. That list tells a contractor exactly where the program needs the most attention, and it speeds up the quote process considerably.
When Does It Make Sense to Hire a Contractor Instead of Doing It In-House?
Scale changes the math fast. Once you're managing more than a few thousand square feet, or multiple buildings, in-house crews start losing ground on equipment costs and training time. Contractors also solve the scheduling problem: night, weekend, or phased-area work keeps a building operational while the floor gets stripped section by section. For larger jobs, expect a lead time of one to two weeks to book crews and confirm access.
— Sales
Get a Quote for Professional VCT Strip-and-Refinish Service
Sparkleprocommercialcleaning handles the part of this job that eats the most staff time: the labor-intensive strip, rinse, and refinish cycle, done on a schedule that fits around your building's hours instead of forcing a shutdown. Our teams run full strip-and-refinish jobs, restorative scrub-and-recoat visits, and ongoing scheduled maintenance programs, so you're not stuck choosing between a one-time fix and a long-term plan.

The process is straightforward: request a quote, we schedule a site visit to assess coat buildup and traffic patterns, we complete the work on the agreed schedule, and you sign off once it's done. To get an accurate quote, have your square footage, current finish condition, and preferred work hours ready. If you're in Delaware, start with our Delaware commercial cleaning page; in Massachusetts, use our Massachusetts service page; in the Pacific Northwest, check our Washington landing page. Everywhere else, reach out through our main site to get a crew scheduled.
Where to Find Manufacturer and Industry Specs
For product-specific dilution ratios and coat counts, consult Armstrong's VCT maintenance guidance, the Opora Supply field guide, and a partner reference on commercial floor care scheduling. Always check the product label's own MSDS for VOC and disposal rules.
Sources
- How to Strip and Wax VCT Floors: A Step-by-Step Guide | Pro-San
- VCT vinyl composition tile floor care playbook | Opora Supply
- Maintenance recommendations for vinyl composition tile (VCT) | FloorExpert (Armstrong guidance)
- How to Strip and Refinish VCT Floors for a Professional Finish | Imperial Dade