
Occupancy readiness cleaning is the last cleaning phase before a commercial space opens or changes hands. It comes after construction debris is gone and rough cleaning is finished. Its job is simple: a tenant, employee or patient walks in and finds every surface clean, every fixture working and nothing left to explain. This guide shows property managers, general contractors and facility teams how to scope it, sequence it, check it and sign it off.
TL;DR
- Occupancy readiness cleaning is the final detail phase: glass, floors, restrooms, kitchen areas, touch points and a walkthrough with a punch list.
- Book it by trigger, not by calendar: after the last trade leaves and before the tenant, furniture crew or inspector arrives.
- Scope it from a documented site walkthrough, zone by zone, so every bid covers the same tasks.
- Chemical handling by cleaning crews falls under OSHA rules, so confirm the vendor's written hazard communication program and training.
- Finish with a joint inspection and a written list of corrections, not a verbal "looks good."
Table of Contents
- What occupancy readiness cleaning covers
- When to schedule it: trigger, not date
- Define the scope with a documented walkthrough
- The order of work
- Room-by-room checklist
- Safety and OSHA basics for the cleaning crew
- Inspect and sign off
- Adjusting when occupancy or hours change
- Our perspective
- Get your space ready with Sparkle Pro
- FAQ
- Sources
What occupancy readiness cleaning covers
Think of it as the finishing layer. Rough cleaning removes debris, dust and packaging while trades are still working. Occupancy readiness cleaning is what makes the space look and function as a finished product. Typical work includes:
- Interior and exterior glass, frames, tracks and sills
- Final floor preparation: vacuuming, detail mopping, and the finish your flooring type calls for
- Restroom fixtures, partitions, mirrors, dispensers and drains
- Kitchen and break room surfaces, including appliance interiors
- Doors, handles, switch plates, railings and other touch points
- Light fixtures, vents, ceiling grilles and tops of ledges
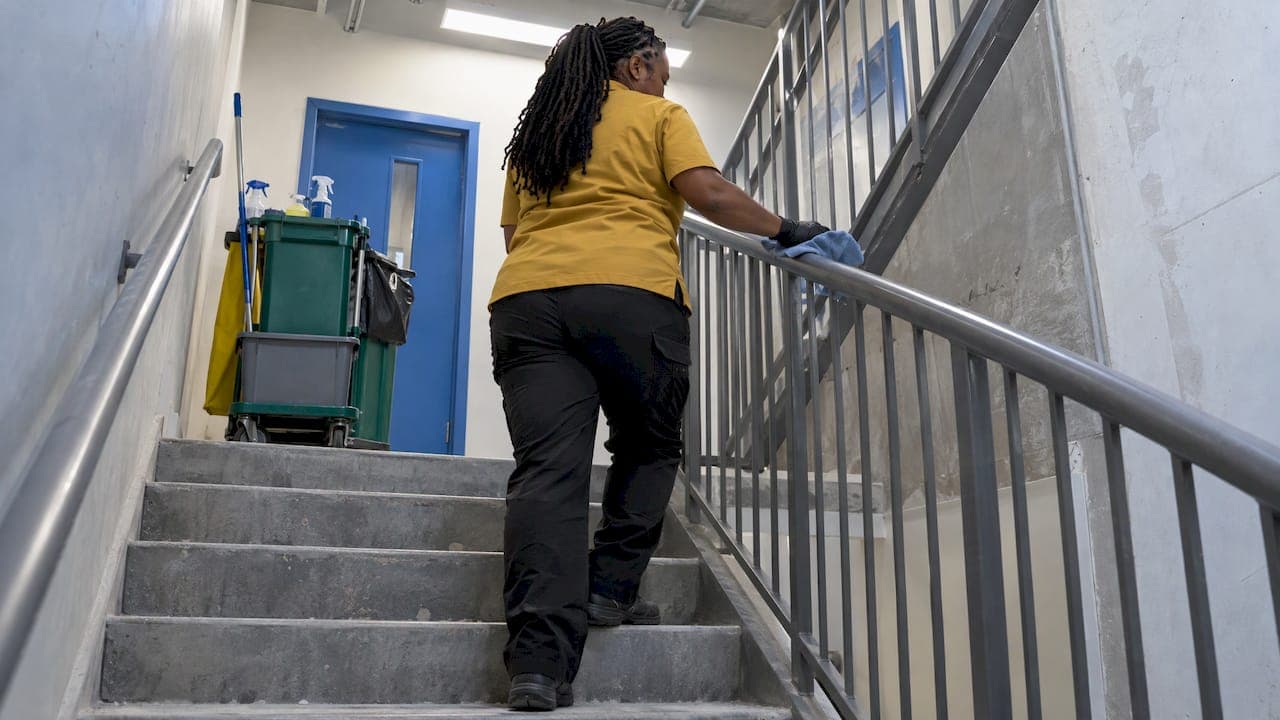
- Elevators, stairwells and lobby finishes
- A walkthrough with the manager, with items noted and corrected
It is not a replacement for post-construction janitorial work. It is the closing stage of it. If you want the three stages laid out room by room, our construction final clean checklist covers them in detail.
When the same service applies
The name changes, the task does not. You will need it when:
- A new building or tenant improvement finishes construction
- A tenant moves out and the suite must be turned for the next lease
- A renovated floor, clinic or retail unit reopens
- A space has sat vacant and needs to be brought back to show-ready or move-in-ready condition
For tenant improvement work specifically, see our guide to tenant improvement cleaning for property managers.
When to schedule it: trigger, not date
The most common mistake is booking the final clean by calendar date. Construction slips. A crew booked for Friday arrives while painters are still touching up, and the dust settles back on freshly cleaned glass. The fix is to attach the booking to triggers:
- Rough clean complete. Debris, protective film, stickers and heavy dust are gone.
- Trades released. Painting, flooring, ceiling, electrical and HVAC finish work are done and no one needs to come back in.
- Systems running. Power, water, lighting and HVAC are on, so restrooms, lights and appliances can be checked while being cleaned.
- Move-in or inspection date confirmed. Place the final clean close enough to the arrival of tenants, furniture or the inspector that nothing re-dirties the space in between.
One rule of thumb holds across most projects: keep the gap between the final clean and occupancy short, and keep foot traffic out of the space after the crew leaves. Our piece on booking rough and final cleans by trigger goes deeper on how to line these up with your project schedule.
If you are also running a job closeout checklist for the contractor side, put the final clean on it as a dated line item tied to the architect's substantial completion inspection, so cleaning is never the thing that holds up the certificate.
Define the scope with a documented walkthrough
A vague scope produces vague bids and disputes at handover. Before you request quotes, walk the building with a notepad and a phone camera, and record the following for each distinct zone:
- Function: lobby, open office, private office, restroom, kitchen, server room, loading area, clinical room
- Surface types: polished concrete, carpet tile, LVT, sealed wood, glass, stainless steel, stone
- Condition issues: paint overspray, adhesive residue, grout haze, scratches, stains
- Touch points: doors, rails, elevator buttons, switches, faucets
- Access limits: key control, elevator reservations, loading dock hours, noise rules, security escorts
- Occupancy pattern: empty, partially occupied, or about to be filled
Photograph each zone and mark it on a floor plan. That field map becomes the bid package. When every vendor prices the same zones and tasks, you can compare quotes on scope instead of guessing what each included. Our property manager's guide to preparing for building cleaning lists what to have ready before the site visit, and the property manager cleaning checklist is a good template for the zone inventory.
Pricing for this kind of work depends on square footage, finish types, the condition the space is in and the access windows you can give. That is why a site visit comes before a firm number.
The order of work
Cleaning top to bottom and back to front is the principle. Gravity moves dust down, and you do not want crews walking across floors they have already finished.
- Protect and prepare. Confirm finished surfaces are covered or marked, keys and elevators are reserved, and utilities are on.
- High work first. Light fixtures, vents, grilles, ceiling-mounted devices, tops of partitions and ledges.
- Walls, doors and hardware. Wipe frames, doors, glass partitions, switch plates and handles. Remove labels and adhesive.
- Glass and windows. Inside and out where reachable, including tracks and sills. Do this before floors, because runoff and debris fall.
- Restrooms and kitchens. Detail fixtures, drains, dispensers, cabinets, counters and appliance interiors.
- Floors last. Vacuum, detail edges and corners, then mop or apply the finish suited to the surface.
- Final walkthrough. Check lighting angles, glare on glass, streaks on stainless, and anything the crew could not reach.
During the rough stage, work usually proceeds area by area as each trade releases its zone. The final stage should not start in an area until that area is truly released.
Room-by-room checklist
Use this table as a starting point and adjust it to your building type.
| Area | What "ready" looks like |
|---|---|
| Lobby and entrances | Glass free of streaks and film, door tracks clean, mats placed, floors detailed to the edges |
| Open office and private offices | Dust-free ledges and vents, clean baseboards, carpet vacuumed with no debris or marks, windows and sills wiped |
| Restrooms | Fixtures and partitions polished, mirrors streak-free, drains clear, dispensers clean and ready to stock |
| Kitchen and break room | Counters, sinks, cabinet interiors and appliance interiors cleaned, no adhesive or protective film left |
| Conference rooms | Glass walls and whiteboards clean, tables wiped, outlet plates and AV panels dust-free |
| Stairwells and elevators | Handrails wiped, tracks and thresholds cleaned, cab walls and floor free of marks |
| Storage, mechanical and server areas | Swept and dust-controlled, shelves wiped, no construction scraps |
| Exterior entry and loading areas | Swept, glass and door hardware cleaned, debris removed |
For healthcare, cleanroom or lab spaces, the standard is higher and defined by your own protocols and any applicable regulations. Give the vendor those protocols at the bid stage, not on the day. Our environmental and disinfecting services are designed for those settings.
Safety and OSHA basics for the cleaning crew
A clean space is no good if the cleaning created a hazard. Before any crew starts, ask for evidence of the following.
Hazard communication. OSHA's Hazard Communication Standard calls for a written program, an inventory of hazardous chemicals, safety data sheets, and training at initial assignment and whenever a new chemical hazard is introduced, given in a language workers understand. Ask your vendor to show these documents. We break the requirements down in Hazard Communication for Cleaners.
Protective equipment. Under OSHA's 29 CFR 1910 Subpart I, employers must provide and ensure the use of appropriate PPE such as goggles, gloves and splash aprons when employees handle hazardous detergents or chemicals.

Bloodborne pathogens. If a space has any chance of blood or other potentially infectious material, for instance a clinic build-out or a vacated space with biohazard waste, employers must follow OSHA's Bloodborne Pathogens standard, including regulated-waste disposal and PPE requirements. Our guide to bloodborne pathogen cleanup rules walks through the steps.
Site rules. On active or recently finished construction sites, the site manager's safety plan applies too. Our construction cleaning safety guide covers what cleaners need to know before they enter.
Also confirm your vendor carries current licensing and insurance and can provide certificates before work begins. Good vendors send them without being asked twice.
Inspect and sign off
Treat the inspection as a formal step. On projects with an architect, substantial completion has its own process. One university's closeout procedures, for example, require a written inspection request at least 10 days before the work is ready, after which the architect inspects and lists items to complete or correct before certification. Your own project documents set the actual notice period, so check them and book the cleaning to finish ahead of that inspection.
For the cleaning itself, run this routine:
- Joint walkthrough with the cleaning supervisor, using your zone map from the earlier walkthrough.
- View surfaces in daylight and with lights on. Streaks on glass and haze on floors show at different angles.
- Open and touch things. Run faucets, open appliances, check drawers, slide door tracks.
- Photograph deficiencies and list them by zone with a priority.
- Set a correction window. Agree when the crew returns to fix punch items, and re-check them.
- Sign off in writing once the list is closed, and keep the photos with the project file.
Then lock the space down. Limit access, keep deliveries to planned routes, and ask movers and installers to use floor protection.
Adjusting when occupancy or hours change
Readiness is not a one-time event. Once people arrive, cleaning has to follow how the building is used. Cleaning schedules should reflect building hours, peak occupancy periods and shifts that affect when work can happen. In practice:
- Phased move-ins: clean each floor or suite as it is released, and keep a lighter maintenance schedule for the finished zones.
- Longer or shifted hours: move heavy tasks, like floor work, to the lowest-traffic window.
- Room-use changes: if a storage room becomes a kitchen or a conference room becomes a clinic, update the scope and frequency for that zone.
- Seasonal swings: heavier entrance traffic and moisture in winter call for more attention to mats and floors.
- Day coverage: restrooms, lobbies and breakrooms in busy buildings often benefit from a day porter between night cleans.
Transition from final clean to routine service by writing down the standing scope, frequencies and access rules from the walkthrough, so the janitorial contract starts where the final clean left off.
Our perspective
We see the same pattern on handover projects. The cleaning itself is rarely the problem. The problem is timing and scope: a crew arrives before trades are done, or nobody wrote down what "ready" means.
That is why we start with a quote and a site visit. We walk the zones, note surfaces and access limits, and build the schedule around your triggers, not around a date that may move. Because we operate nationwide with local crews, we can match the schedule to your building wherever it is.
A final clean should be the easiest line on the closeout list. When the scope is documented, the crew is trained and insured, and the walkthrough is joint, it is. We also carry that same scope forward into routine janitorial, so the tenant's first week looks like the hundredth.
Sales
Get your space ready with Sparkle Pro
If you manage a building, a turnover or a build-out, we handle the final stage and what comes after it: post-construction cleaning, tenant turn and move-out cleans, deep cleans, disinfecting, environmental services, eco-friendly options for LEED properties, janitorial and day porter services. The process is four steps: quote, site visit, scheduled cleaning and your approval.
Tell us your property type, size and target move-in window through Sparkle Pro Commercial Cleaning, and we will set up a site visit.
FAQ
How is occupancy readiness cleaning different from post-construction cleaning?
Post-construction cleaning is the whole sequence, from debris removal and rough cleaning through the final detail work. Occupancy readiness cleaning is the last stage of that sequence, aimed at a space that will be occupied soon. It is also used outside construction, for tenant turns and reopenings.
How soon before move-in should the final clean happen?
As close to occupancy as the schedule safely allows, after all trades are released and before furniture, IT or tenant staff enter. Leave time for a joint walkthrough and a correction visit. Your project documents and inspection dates should set the exact window.
Who should be at the final walkthrough?
The property or facility manager, the cleaning supervisor and, on construction projects, the general contractor's representative. The architect attends when the cleaning is tied to a substantial completion inspection. Everyone should work from the same zone list and photos.
What should I ask a cleaning vendor before hiring them?
Ask for proof of licensing and insurance, their written hazard communication program, evidence of chemical safety training, and their experience with your property type. Then ask how they build the schedule around your triggers and how they handle punch-list corrections.
Sources
- OSHA eTool: Hospitals, Housekeeping, Hazardous Chemicals
- CDC interim recommendations for US community facilities
- Northwestern University closeout procedures
- Job Closeout Checklist for Trade Contractors